 Mellow Machines
 A little ESP32 desk companion that shows when a coding agent is working or needs you. A Mac runs MellowHarness; the board draws the face. Enable Jev for model-guided moods and reactions. This walkthrough uses the open Pixel character and the CYD board.
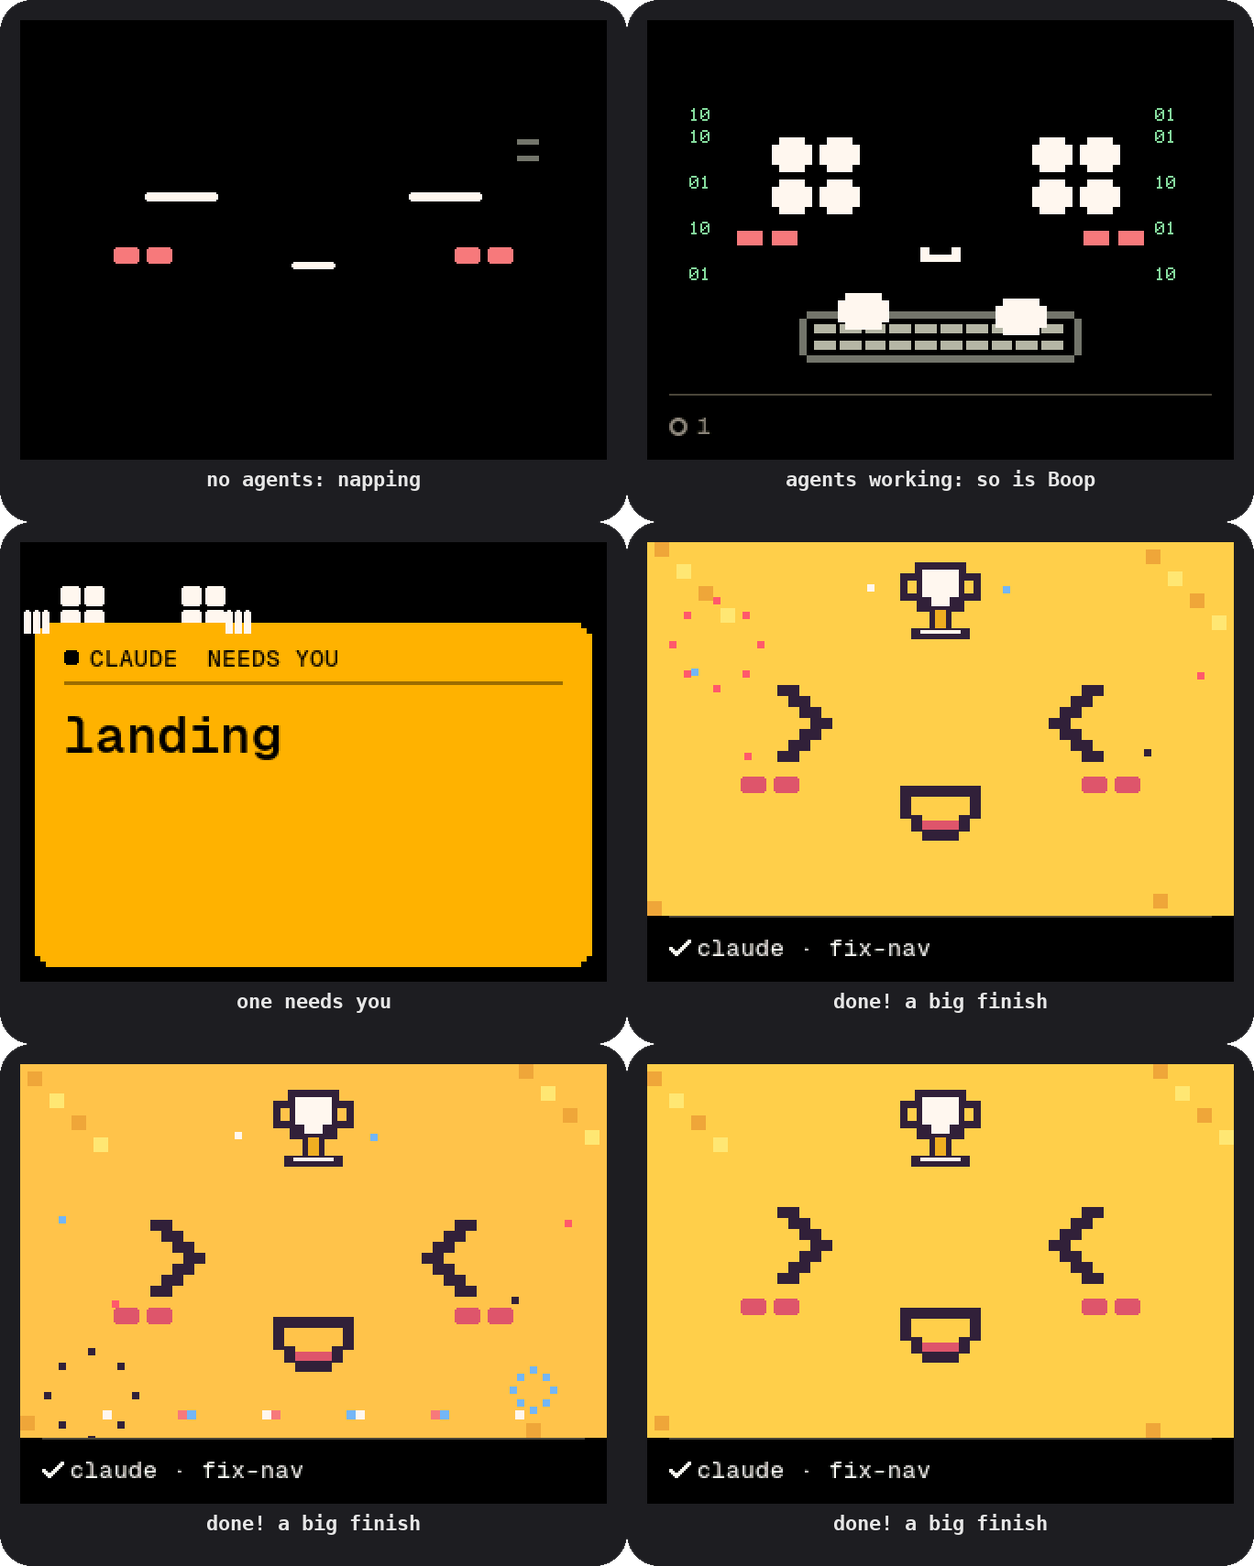
The route: harness → animation → hardware
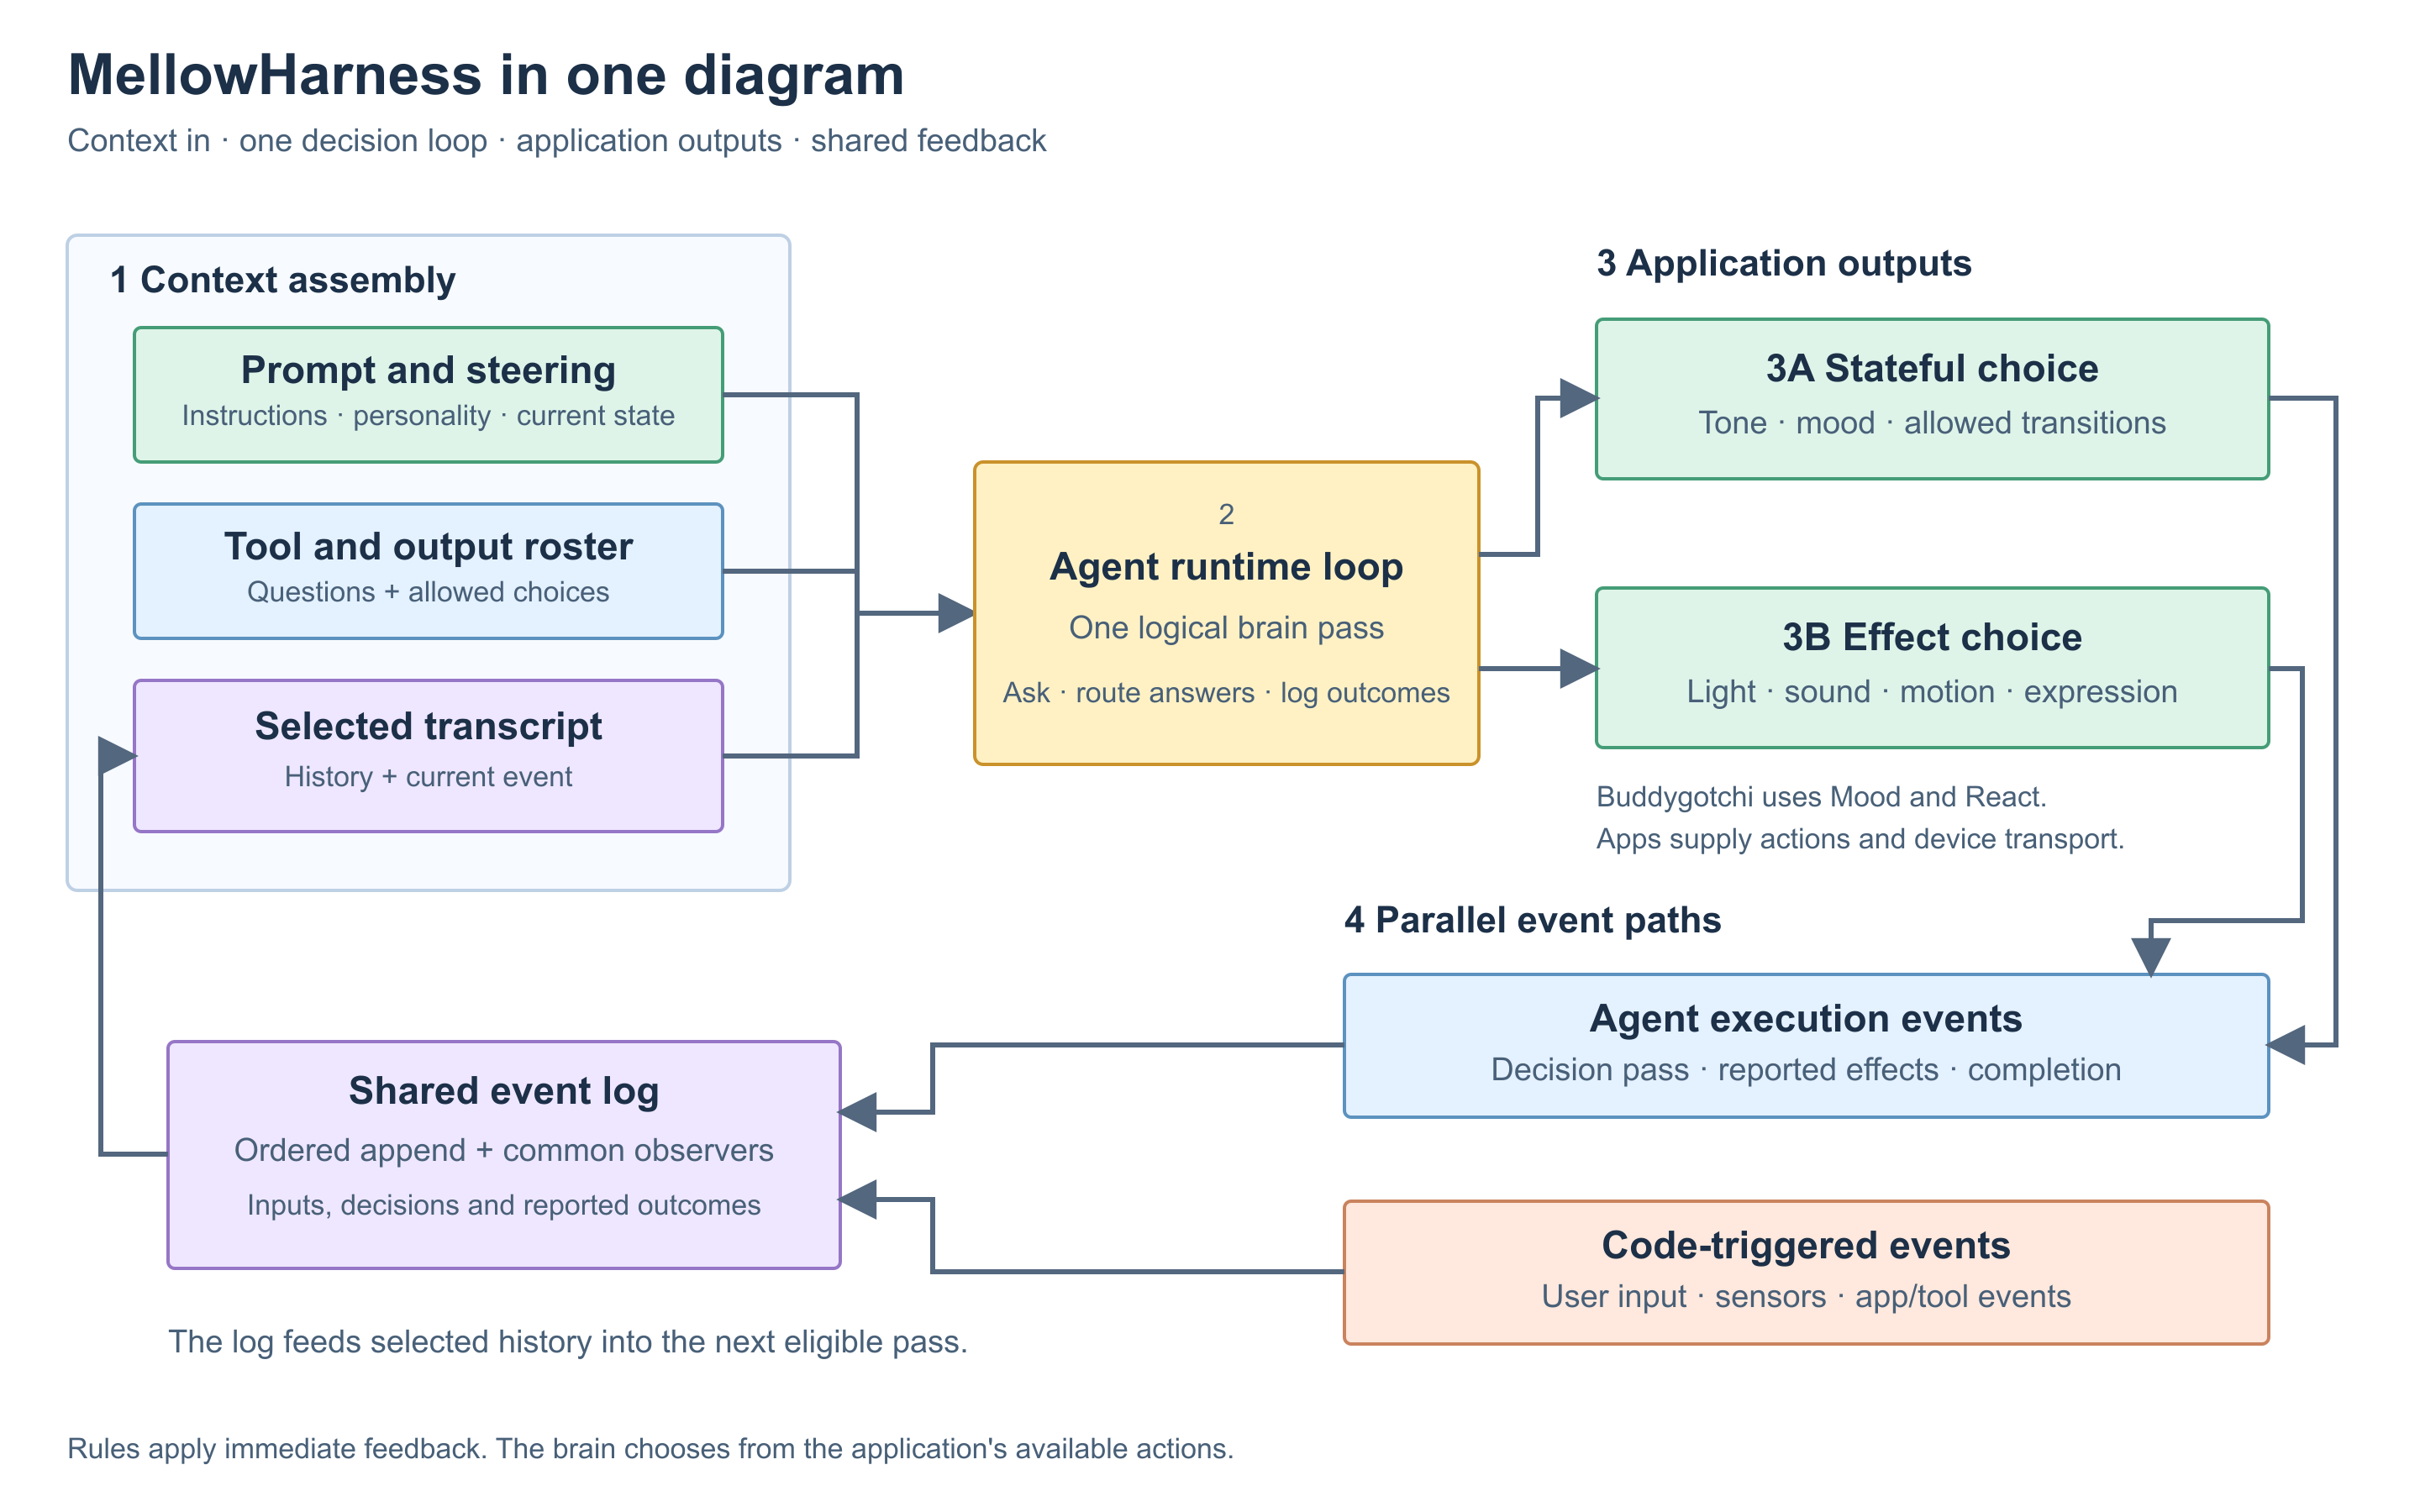
Buddygotchi connects three jobs: understand the moment, choose an expression, and play it on a device. Keeping those jobs separate makes it easier to adapt the project to your own hardware.
Events, immediate rules, context and bounded model choices
A character pack maps state and mood to faces and sounds
LinkKit carries commands and interaction results to and from the ESP32
The project’s current README calls the companion Boop. We use Buddygotchi here for the application and repository.
Before you start
Use a Mac with macOS 26 or later, Command Line Tools and Python 3.10 or later. For the public Pixel build, use the MicroTech MTR024QV01A-V1, SKU E32R24P and a USB cable that carries data. The display and touch controller are already on the board.
The ESP32 parts list separates the essentials from optional audio and storage. Check the exact board model before ordering: boards sold as “Cheap Yellow Display” can have different screens and pins.
A Jev key is optional for the first checks. Agent work and attention display work without one; model-guided reactions and celebrations need a key from TypeSafe. The model runs remotely, rather than on the ESP32.
1. Understand the harness
The application combines coding-agent hooks, device interactions and its own outcomes into context for MellowHarness. Local rules handle immediate task feedback. Jev, a System One Model, answers multiple-choice questions about the allowed moods and reactions.
For example, a permission request can make the companion show needs_you immediately. The model’s next pass can interpret the surrounding work and choose an appropriate expression. A delayed model response should not hold up that attention signal.
AgentHooks normalizes Claude Code and Codex hooks. MellowHarness owns the decision loop. Buddygotchi defines the companion’s rules and action space. You can try the loop independently with the scripted quickstart.
2. Give the loop a character
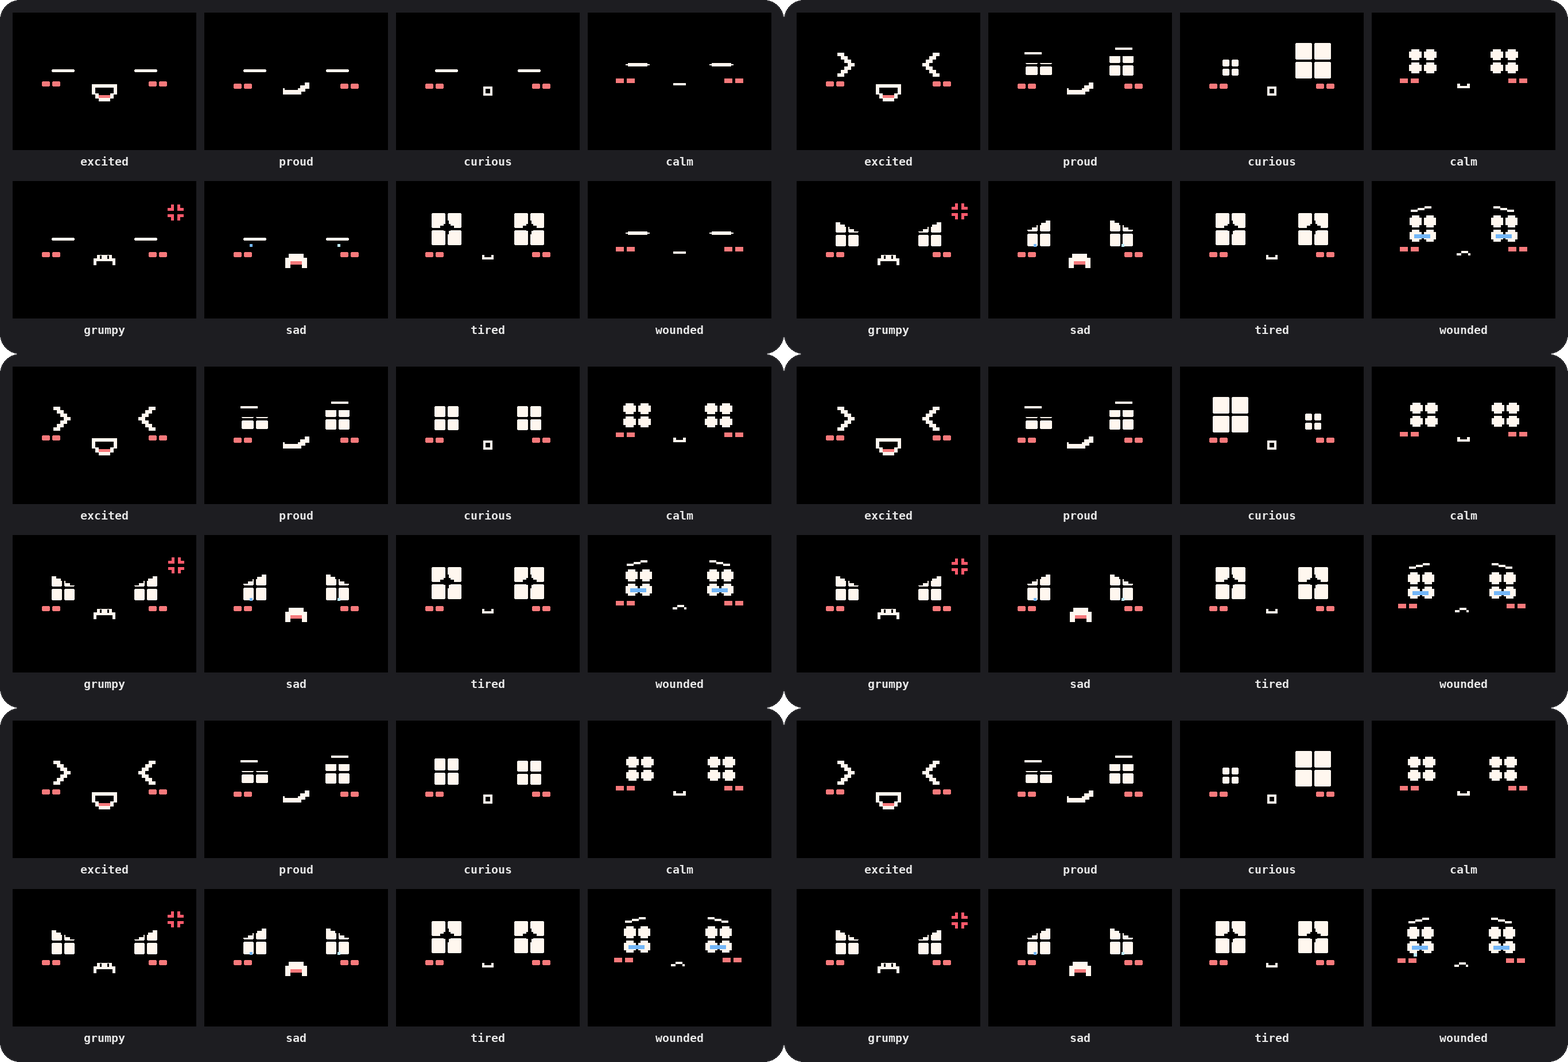
The public example lives in characters/pixel/. Its pack supplies authored steering, 13 moods, a traversal graph, pixel faces and sound effects. It has no recorded voice bank.
Three layers shape what you see:
- Personality: authored Markdown describes the character. The public Pixel pack currently offers one authored personality. Nightly auto-dream learning and saved personality evolution remain work in progress.
- Mood: Jev chooses within the pack’s permitted graph. Staying in the current mood is also an option; larger jumps need qualifying events.
- State: application rules track what the coding agents are doing, such as working or needing you. The face combines that state with the mood.
This excerpt from Pixel’s character.json shows the available connections out of grumpy:
"moves": {
  "ordinary": ["irritated", "annoyed", "whiny", "determined"],
  "dramatic": ["calm", "wounded", "sad", "proud"]
}
The model interprets the situation inside this designed space. It does not invent a new mood or an animation the device cannot play. The character-pack contract explains the graph, steering folders, face interface and fallback behavior.
3. Build and connect the board
Clone the application with its package submodules:
git clone --recurse-submodules https://github.com/Mellow-Machines-Lab/buddygotchi.git
cd buddygotchi
Choose the public pack explicitly, then flash the CYD board over USB:
CHARACTER=pixel python3 characters/charactergen.py --which
CHARACTER=pixel BOARD=cyd24 make flash
The first command prints the selected pack. Flashing replaces the board’s firmware; the wrapper installs PlatformIO and its toolchain inside the checkout if needed.
Start the host from your own terminal, so it can request Bluetooth access:
CHARACTER=pixel make runComplete onboarding and choose the coding agents to watch. Restart existing agent sessions so they pick up the installed hooks. Add a Jev key in Settings when you want to enable model-guided behavior.
LinkKit, currently inside this repository, carries state and action messages over Bluetooth or USB. The board reports interactions and action outcomes back to the host. Rendering stays on the board.
4. Check the path before customizing
- Device: confirm the face renders, then tap the screen or press BOOT.
- Agent hooks: start a coding-agent turn and check the work state. Trigger a real permission request and confirm the attention signal.
- Model behavior: with Jev enabled, inspect a meaningful reaction and its mood choice.
- History: run
make dayto inspect what the application recorded and why.
The firmware has separate bring-up tools:
internal/tools/boopctl ping
internal/tools/boopctl play pattern
internal/tools/boopctl state
Use ping for version and link information, the pattern for display orientation, and state for input and audio status. Physical touch and sound still need a person to check them. See the firmware guide for connection and recovery details.
These steps follow the public source instructions. This article has not independently flashed a board or measured current end-to-end latency.
Use the pieces in your own project
Start with one input and a small action roster: a button, a few expressions and an immediate acknowledgement. Define the mood connections and the meaning of each choice. Feed completed or failed actions back into the log so the next model pass sees what actually happened.
For character changes, edit the pack’s steering and graph; the Mac reads its selected pack at launch. Face changes require rebuilding and flashing the firmware. Keep the host and device on the same character choice.
This guide will evolve with the public character-pack contract. Follow the repository for current code and Lab updates for new technical sharings.